NUS · EG1311 Design & Make · Feb – Mar 2025
Autonomous Obstacle-Course Robot
EG1311 is the Design and Make module. The course was a 3 cm bump, a 10 cm slope and a 30 cm wall, and the robot had to get across, launch a ping-pong ball over the wall and come back to the start, with nobody touching it. The rest of my team weren't CS students, so I wrote all the code and designed the circuit, and we built the body together with laser-cut parts. It was a lot of fun.
01How it works
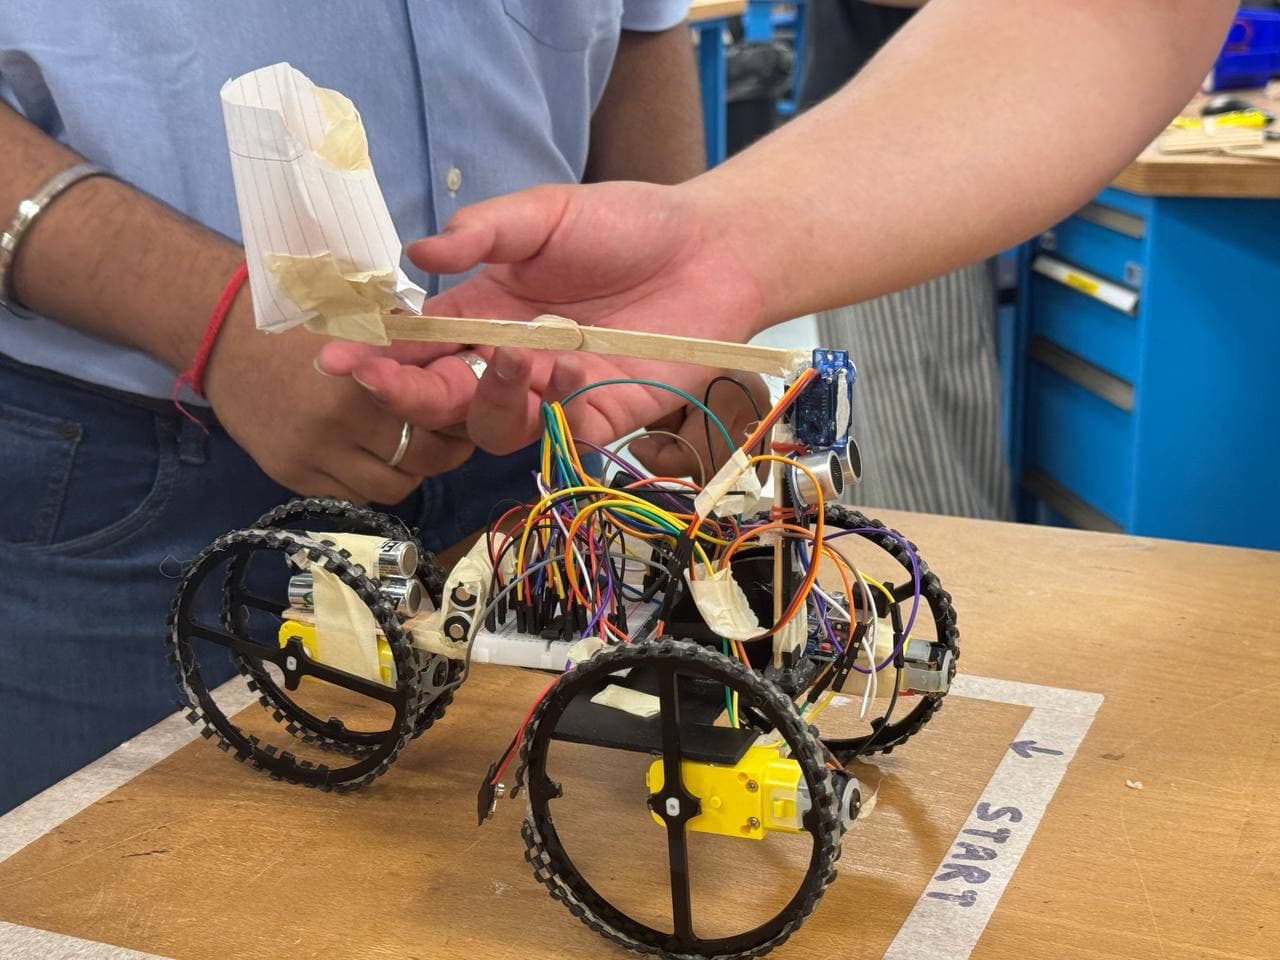
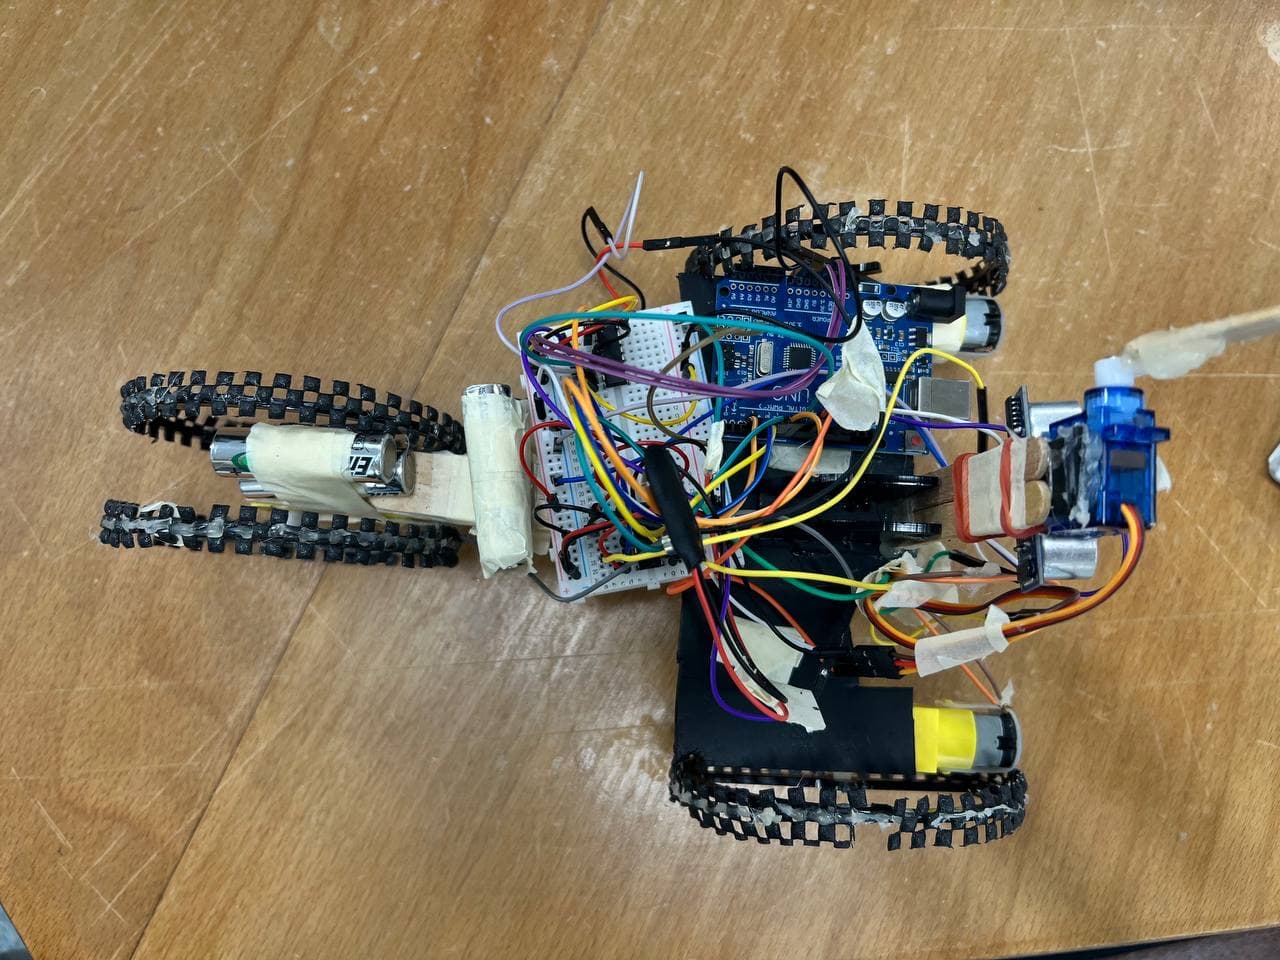
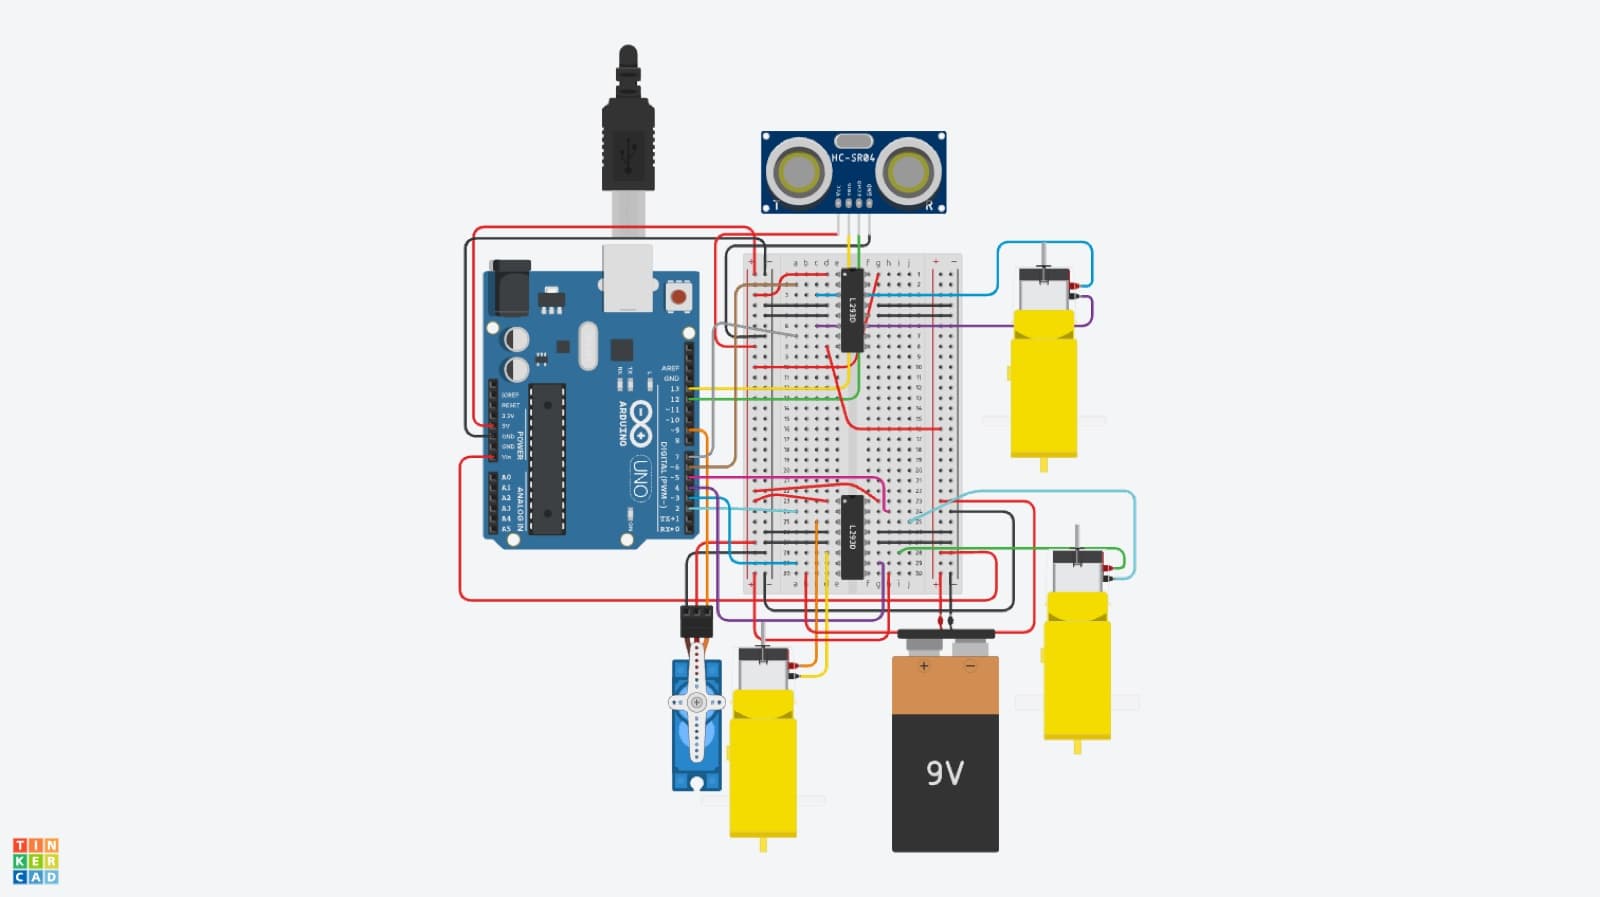
The simple way to do this is to drive forward for a fixed time and then fire, but that breaks as soon as the floor grips differently or the battery runs down. So the robot checks an HC-SR04 ultrasonic sensor on every loop, times the echo and turns it into a distance. When the distance falls into a narrow band near the wall, it stops, waits three seconds for the body to settle, swings a servo to launch the ball, and reverses.
The three drive motors run off two L293D motor drivers. The sensor had to be mounted high, or the bump and the slope looked like the wall and the robot stopped halfway. We raised it on a propylene board braced with two ice-cream sticks, which wasn't pretty but worked.
02Building it
The wheels took four versions. 8 cm cardboard wheels were too small to get over the bump, and 10 cm laser-cut acrylic wheels cleared it but slid on the slope. Rubber bands gave grip but wouldn't stay on, so the final wheels were acrylic with strips of anti-slip mat, which got up the slope easily.
The ball holder went through a few shapes too. The final one is tilted back past 90 degrees, raised, and has a curved lip, so the ball stays in over the bump but flies out cleanly when the servo fires. I tested the motor speeds and found the front-right one was slightly weaker, so we angled the front wheels a little to keep the robot driving straight. And we ran everything from a single 9V battery, which gave the motors steadier power than a separate battery pack.
On the day, it ran the whole course, and I got an A+ for the robot's run.